CourseLeaf/CLSS FAQs
Please note, this is only for Phase I and Phase II schools.
If you are responsible for submitting class schedules for a Phase I or II school/department and need access to CourseLeaf/CLSS, here is what you should do:
Must complete online CourseLeaf training, found in the Brainier Learning Management System. To access Brainier, please login to PeopleSoft/Self-Service with your Emory username and password. From the home page, follow the path below to access courses:
- Under Self-Service, select the Learning Management tile
- Next, select Learning Management - Brainier
- Once in Brainier, search the course name “CLSS” in the search bar located at the top of the page
- Enroll and complete the “CourseLeaf (CLSS) Training”
- The training consists of the following four training video’s and quiz
- CourseLeaf (CLSS) Introduction
- CourseLeaf (CLSS) Manage Classes
- CourseLeaf (CLSS) Advanced Options
- CourseLeaf (CLSS) Finalize Schedule
- CourseLeaf (CLSS) Quiz
- You must score at least 80%.
- You may retake the quiz two more times, if you don’t score 80%.
- After the third try, you will have to attend a training session in person.
- Complete the A+ Access form found in OPUS
- Using the drop down in the upper left of the screen, select “Hello OPUS”
- Click on the “Request OPUS Access” tile
- Select the “Supplemental Access Request (A+) Form”
- Email the completed A+ form to clsshelp@registrar.emory.edu. Please include in the subject line: “CourseLeaf Access Request.”
- If all is correct, access will be granted, and the requestor will receive an email confirmation. Please note, granting access to CLSS may be delayed during high peak class scheduling periods.
- The training consists of the following four training video’s and quiz
Enter the new topic in the “Comments” section (i.e. New Topic: I Love Emory). Please note, topics are limited to 30 characters or less (including spaces and punctuation).
- If students are enrolled or on the wait list, please notify those students first before submitting the request.
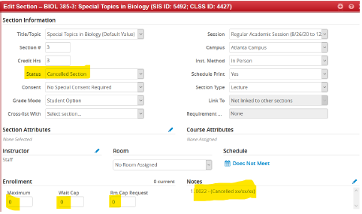
- Change the Status from "Active" to “Cancelled Section”
- Change the Enrollment numbers to “0”
- Enter the pre-flight cancellation code of 0022 in the Notes section.
- Click “Save Section”
Text entered in the Notes section will go directly into OPUS and WILL be visible to ALL in OPUS. Text entered in the Comments section will only be visible to the Registrar’s Office, will NOT feed directly into OPUS, and will not be visible in OPUS.
Only numeric values will be accepted in CourseLeaf/CLSS. The CourseLeaf system will not accept alphanumeric values as section numbers (i.e. 00P, first 3 or 4 digits of an instructor’s last name, etc.)
- Once in a section, under schedule, select the link to the right of the calendar. It will say “Does Not Meet”
- This will take you to the Snapper screen, select the “Patterns” drop-down
- In the “Meeting Pattern Name” box, enter in capital letters the meeting day(s), a space, and then the time (i.e. Th 6pm-9pm). You must enter AM or PM.
- Select “Add”
- Select “Accept”
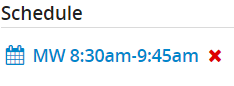
- Once in a section, under schedule, select the link to the right of the calendar. There should already be a meeting pattern listed.
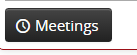
- Select “Meetings” at the bottom left of the screen.
- Select the green plus button to add an additional meeting pattern
- Make your room selection (if needed)
- Enter dates only if they are specific (i.e. 2017-08-18 to 2017-08-18); Select “Accept”
- Select the new meeting pattern (it will be highlighted in green)
- This will take you to the Snapper screen, click the “Patterns” drop-down
- In the “Meeting Pattern Name” box, enter in capital letters the meeting day(s), a space, and then the time (i.e. F 6pm-7:30pm). You must enter AM or PM.
- Select “Add”
- Select “Accept”

Please select the refresh button (highlighted below) or clear your history/cache.

- You must add the new class (writing) in CourseLeaf with the same details as the current (non-writing). That is, if everything will remain the same.
- Change all of the enrollment fields of the current (non-writing) class to “0”, to ensure additional students don’t enroll.
- If there are students enrolled in the current (non-writing) class, you must notify them that this class is being replaced with a writing class, and the current (non-writing) class will canceled. You can then offer to do either of the below:
- Ask the students to notify you if they would like to be swapped into the new writing class. You would then swap them, if it is during add/drop/swap.
- Notify the students that they will be swapped from the current non-writing class to the new writing. They may then adjust their schedules as needed.
- Once the students have been dropped from the current class or swapped into the new class, you would cancel the non-writing class in CourseLeaf.
- Change the Inst. Method to “Distance Learning”
- Change Room to “ONLINE”
If the grade mode for the course is set to “Student Option”, you may enter in the comments section for example “change grade mode to graded” or whatever mode you would like it changed to.
If there is a new instructor who is not listed in the drop down menu in CLSS, please enter that instructor’s name and employee ID in the Comments section. A new instructor must be entered into OPUS first by the Registrar’s Office. He/She will then be uploaded into CLSS.
- The originating department would submit the request and any updates if needed
- The originating department would enter the number of seats in the enrollment space for their allotted seats.
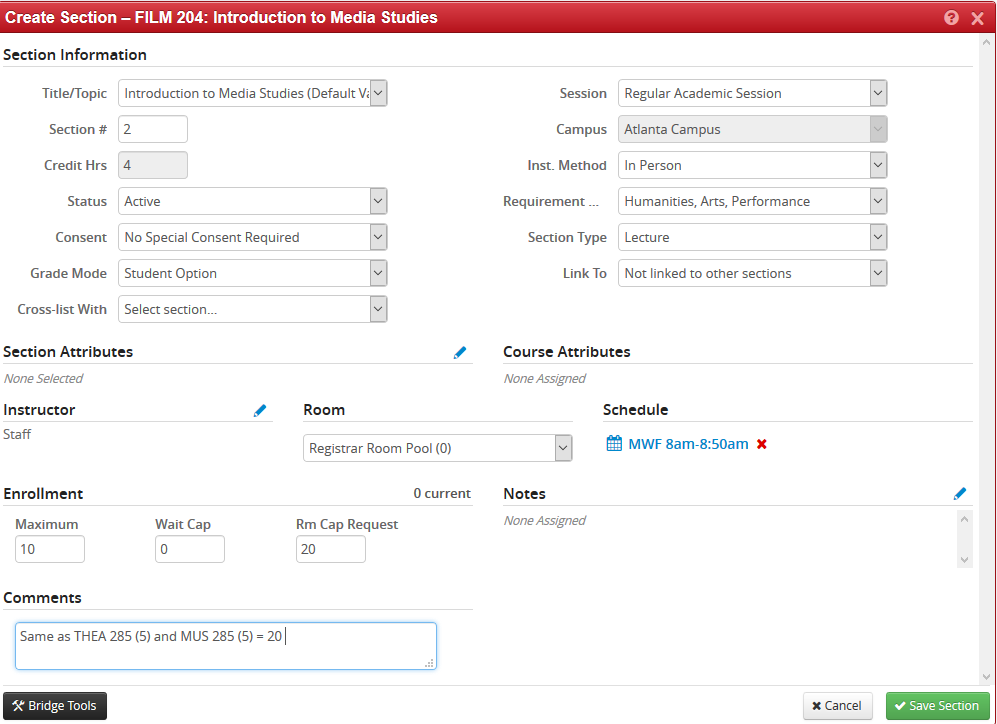
- The originating department would enter the class(es) to be cross-listed in the Comments section.
- The originating department would also include the number of seats allotted for each cross-listing in the Comments section. (See snap shot below)
Note: The number in parenthesis is the number of seats allotted for each class. It is also good practice to include the total number of seats, so there is no confusion.
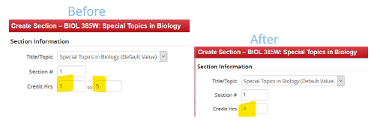
- Variable Credit Hours
- Enter the fixed credit hours in the credit hour fields.
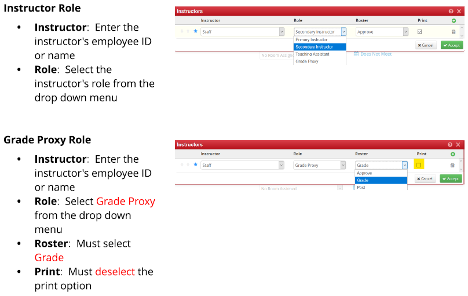
- Instructor Role and Grade Proxy
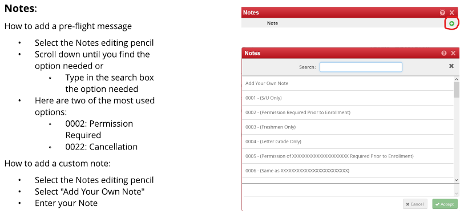
- Notes Number Field
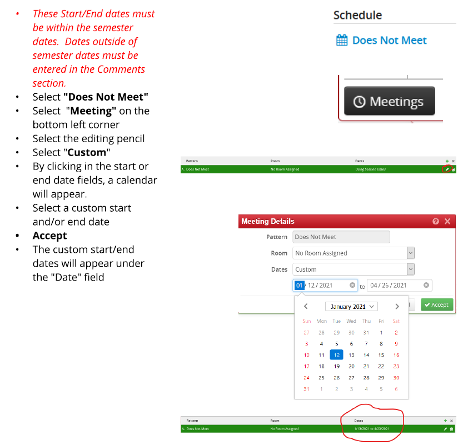
- Meeting Start/End Dates