Block Enrollment
Introduction
Block Enrollment is an effective tool when making enrollment actions for a select or large group of students into a specific class or multiple classes. The Block Enrollment feature in OPUS allows for easy updates of class changes related to credit hours, grades, grading basis, or Emory College's General Education Requirements (GERs) for all enrolled students in a class. Enrollment actions may include swapping, dropping, or enrolling students.
Block enrollment is inappropriate when making specific class changes, such as instructor, title, topic, room, or time. The Block Enrollment process is a better option than Quick Enroll when the entire class or a large group of students receive the same enrollment action.
Navigation
- Log in to OPUS using your Emory Network ID and Password.
- Click the Block Enrollment folder from the left side menu to expand options.
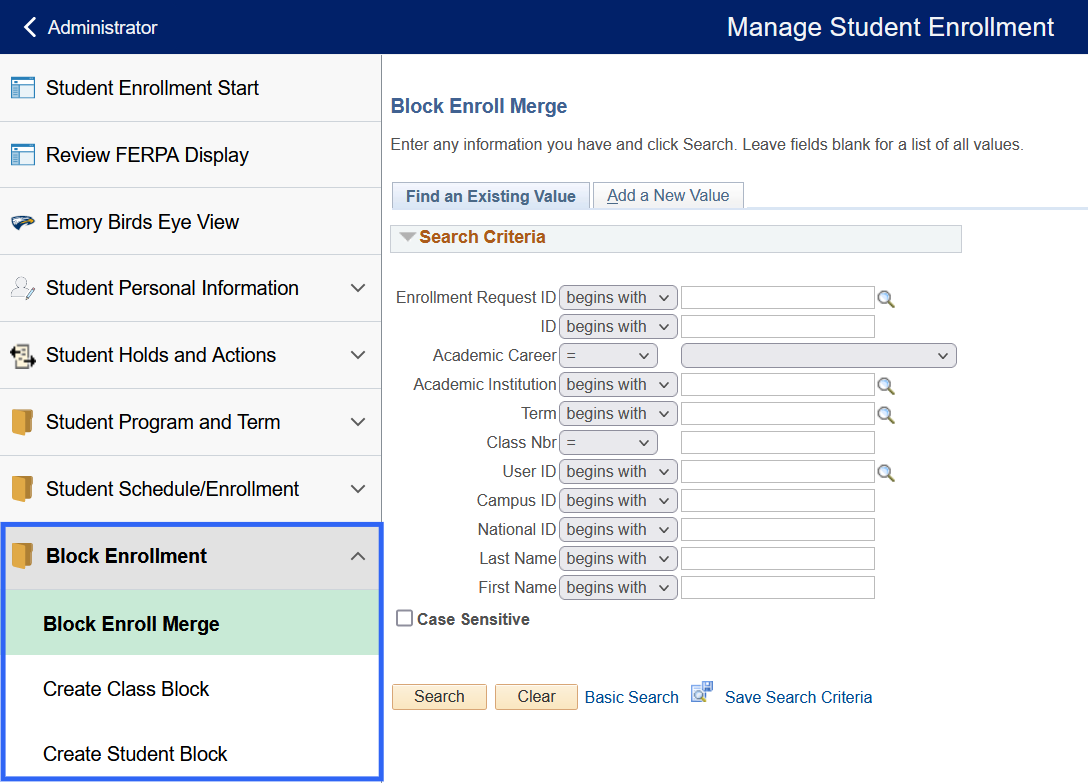
There are three menu options:
- Create Student Block.
- Create Class Block.
- Block Enroll Merge.
This document will review each of these options and how they intersect.
| Click the tabs to move between the panels. Do not use the browser's back arrow to navigate these panels. |
Create Class Block
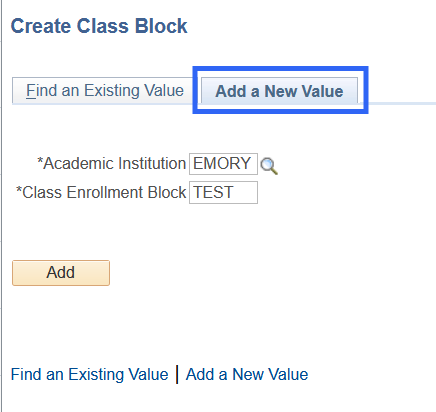
- Click Add a New Value.
- Enter a name for the Class Enrollment Block (remember this name).
The Class Enrollment Block name is necessary when merging the Class Block and Student Block. - Click Add.
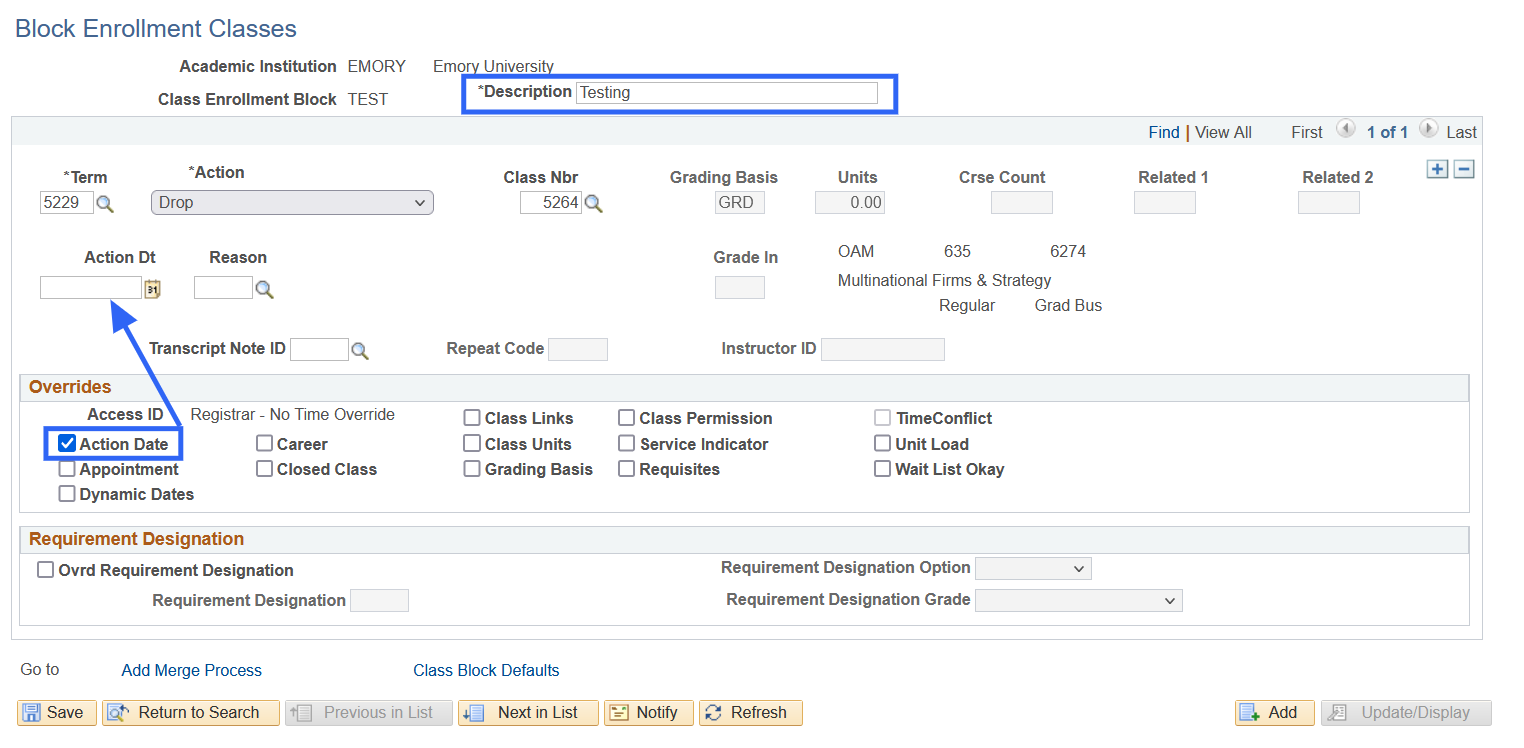
- Enter a simple description (required).
- Enter course information and actions.
- Select necessary overrides.
Options for Class Block Enrollment Actions: Enroll
- Term: Enter the term.
- Action: SelectEnroll.
- Class Nbr: Enter4-digit Class Number.
- Overrides:
- Click the Class Permission box if the class is Permission Only.
- Click the Action Date box if enrolling students after the Add/Drop/Swap date. A new box appears to enter the new date. Use the last day of Add/Drop/Swap for the semester of the enrollment as the Action date.
- Select necessary overrides.
- Click Save.

Drop
- Term: Enter Term.
- Action: Select Drop.
- Class Nbr: Enter the 4-digit Class Number.
- Overrides:
- Click the Action Date box if dropping students after the Add/Drop/Swap date. In the new box that appears, use the last day of Add/Drop/Swap for the semester of the drop as the Action date.
- Click the Class Permission override for Medical School classes. Most of these classes require permission to drop.
- Click the Unit Load override for Medical School only. When the Medical School drops classes, it may allow students to be less than full-time.
DO NOT click this override for other schools. - Select necessary overrides needed to drop.
- Click OK.
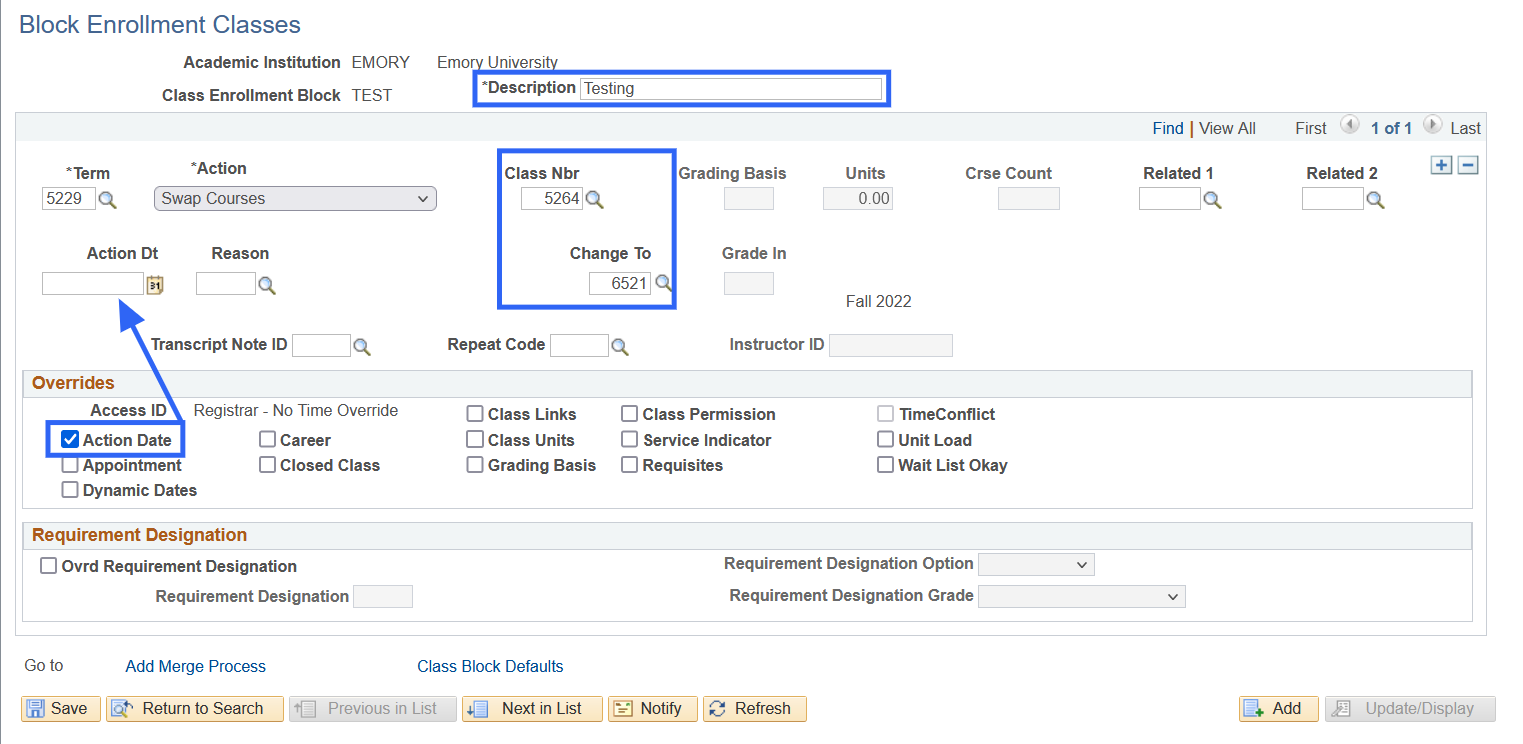
Swap
|
- Term: Enter Term.
- Action: Select Swap Courses.
- Class Nbr: Enter the 4-digit number for the old class.
- Change To: Enter the 4-digit number for the new class.
- Overrides:
- Click the Action Date box if swapping students after the Add/Drop/Swap.
Enter the last day of Add/Drop/Swap for the semester of the swap in the Action Date box. - Click the Class Permission Override box for Permission or Medical School classes.
- Select applicable overrides needed to swap.
- Click the Action Date box if swapping students after the Add/Drop/Swap.
- Click Save.
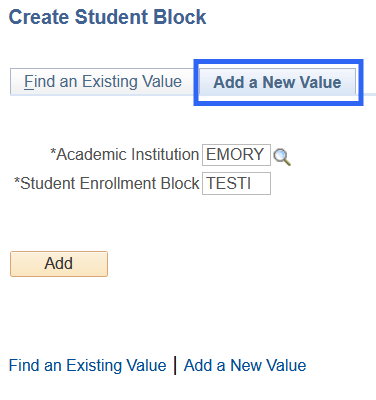
Create Student Block
- Click Add a New Value.
- Enter a name for the Student Enrollment Block.
Remember this name. The name is necessary when merging the Class Block and Student Block. - Click Add.
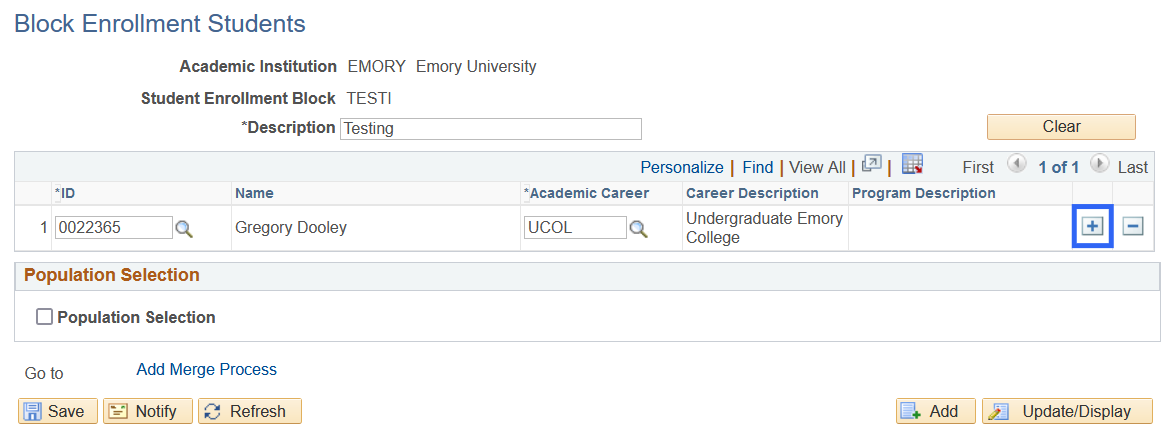
- Enter a simple description (required).
- Enter EMPL ID and Career.
- Click the plus sign (+) to insert Row and enter the next EMPL ID. Repeat as necessary.
TIP:
It is recommended to save periodically after entering several names/careers for medium or large classes. - Click Save.
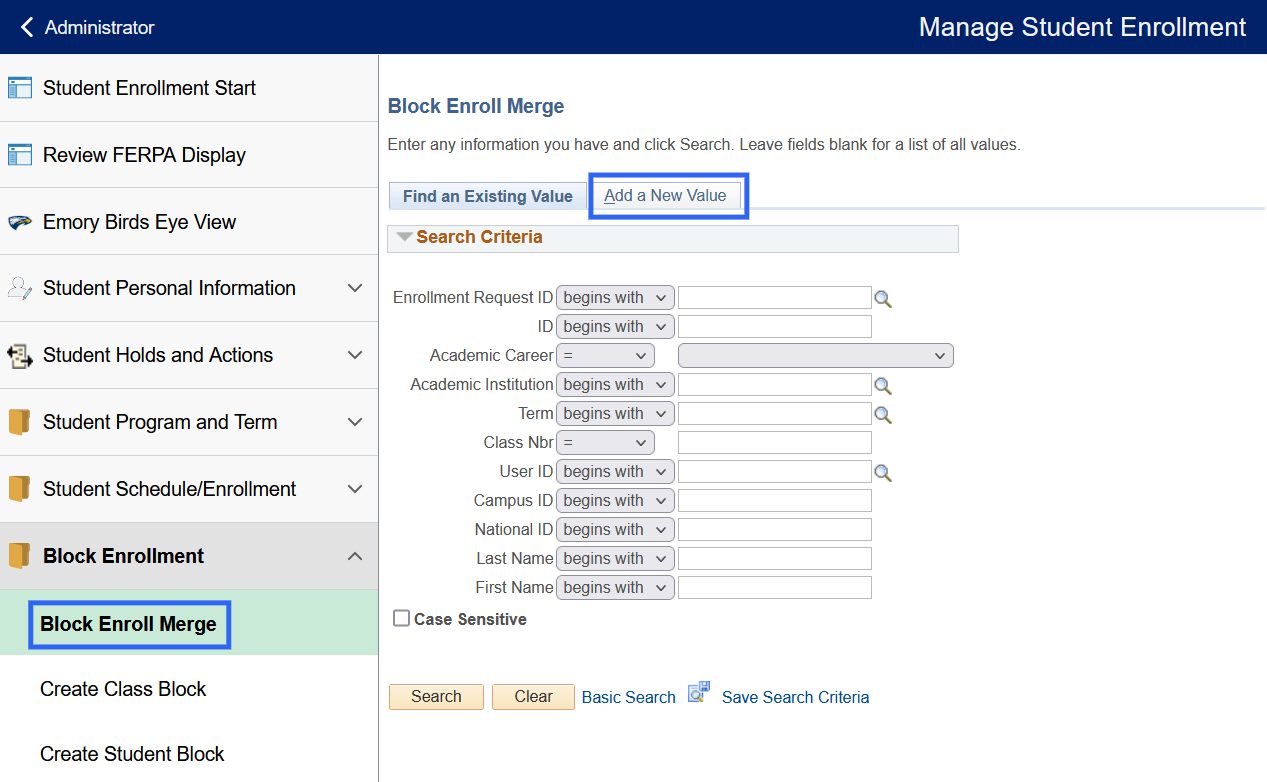
Block Enroll Merge
After creating the Student Block and Class Block, it is time to merge the blocks to change the student schedule.
- Click Add a New Value.

- Enter or Search for the Student Block name and Class Block name.
- Click Merge.
- Click Submit.
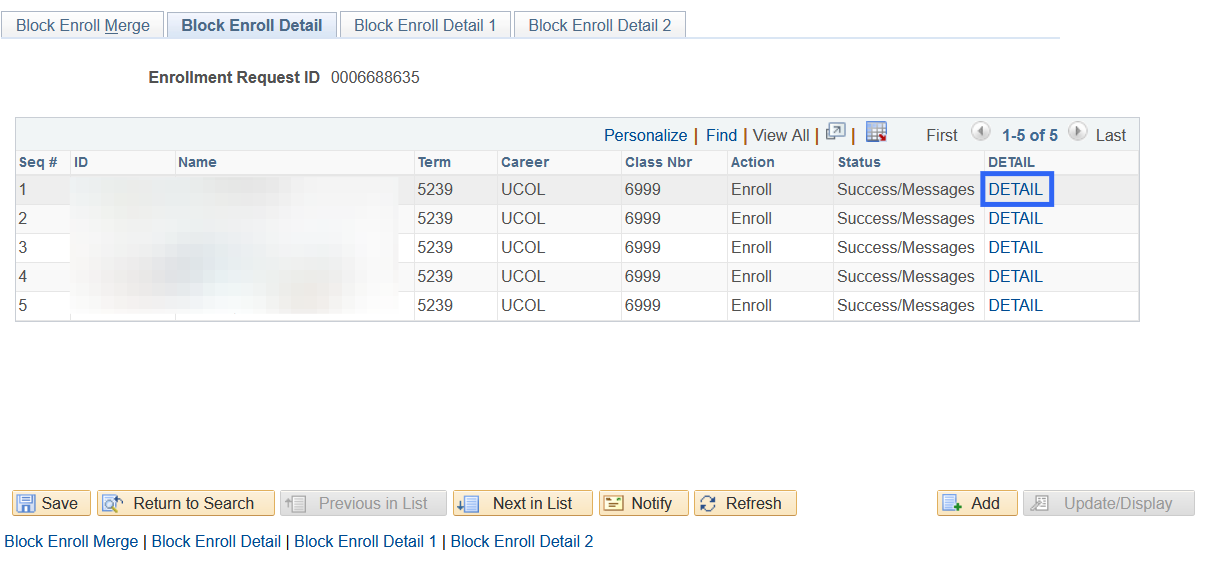
- Click Retrieve to review the status of the merge.
This will open the second tab, Block Enroll Detail. - Review the Status column to see if the merge was successful.
- Click the Detail link to see additional information and/or how to correct any errors.
- The Detail link will open the third tab, Block Enroll Detail 1, which will display any messages.
The last tab, Block Enroll Detail 2, will display class information and requirement designation, if any.
- The Detail link will open the third tab, Block Enroll Detail 1, which will display any messages.
To print: Command + P for (MAC), Control + P for (PC).