Class Rosters
To print: Command + P for (MAC), Control + P for (PC).

 To print: Command + P for (MAC), Control + P for (PC).
Introduction
This documentation will assist with the viewing and printing of class rosters for your school or department.View Class Roster
Navigation
- Pathway: OPUS NavBar > Menu > Curriculum Management > Class Roster > Class Roster
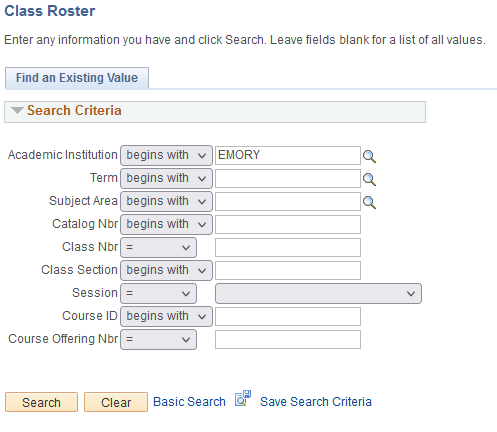
- Academic Institution: Defaults to EMORY.
- Term: Enter or select the appropriate term (50X6 summer, 50X9 fall, 50X1 spring).
- Subject Area: Enter or select the course subject or use the magnifying glass to drill down.
- Catalog Nbr: Enter the course number (SPAN 202, BIOL 470, etc.) if a special number or group of numbers is requested. Leave blank if no specific course number is requested. All offerings for the subject will be returned.
- Class Nbr: Enter the 4-digit class number if a specific class is requested (SPAN 202 000 – 2149).
- Class Section (Optional): Enter the class section (used to refine the search).
- Session (Optional): Enter session (used to refine search).
- Course ID (Optional): Enter course catalog ID (used to refine search).
- Course Offering Nbr (Optional): Enter the assigned course offering identifying number (used to refine search).
- Click Search.
- Select the correct class to view.
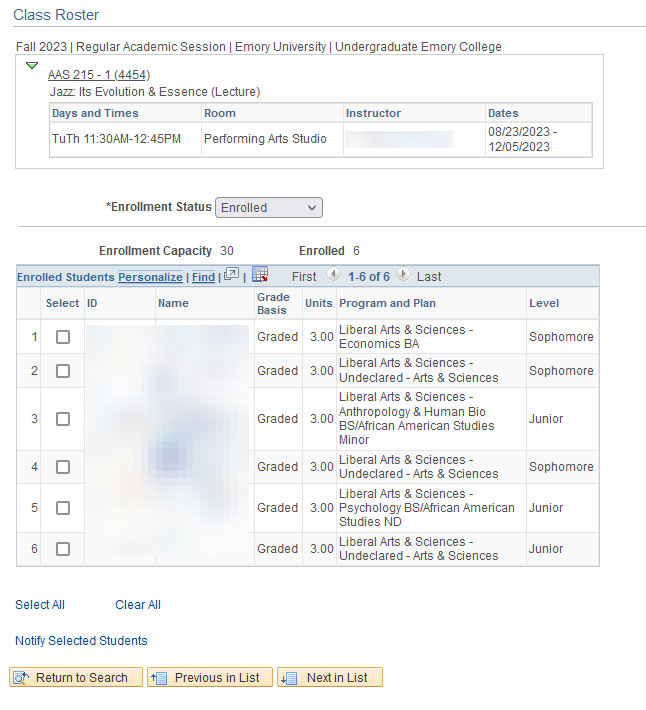
The class roster includes:
- The class roster includes Subject, Catalog Nbr, Section, and Title of Course.
- Meeting Information: Includes Days and Times, Room, Instructor, and Meeting Dates.
- Enrollment Status: The status defaults to Enrolled.
- Enrollment Capacity and Enrolled: Displays the maximum number allowed for enrollment and actual enrollment.
- Enrolled Students: A numbered list of students, including ID, Name, Grade Basis, Units, Program and Plan, and Level.
Print Class Roster
Navigation
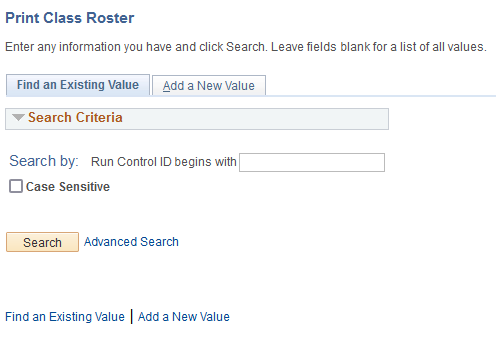
- Pathway: OPUS NavBar > Menu > Curriculum Management > Class Roster > Print Class Roster
Run Control
- When setting up a Run Control for the first time, set up a Run Control by Adding a New Value.
- After the first time, use the same run control using the Existing Value.
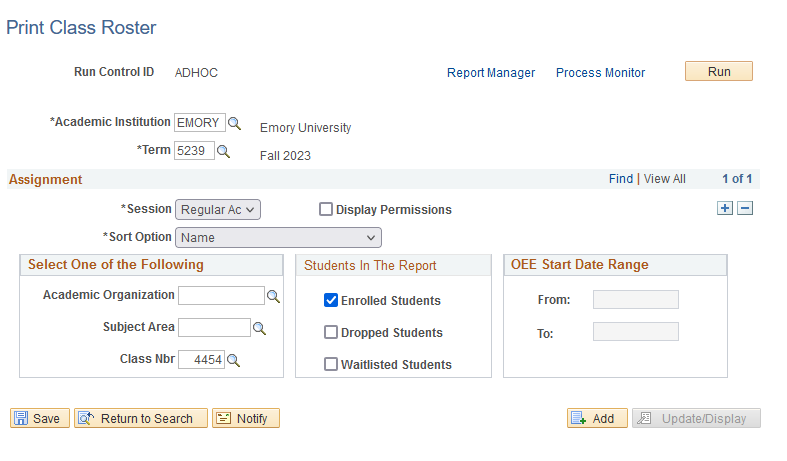
- Run Control ID: Enter the Run Control ID assigned during the first setup.
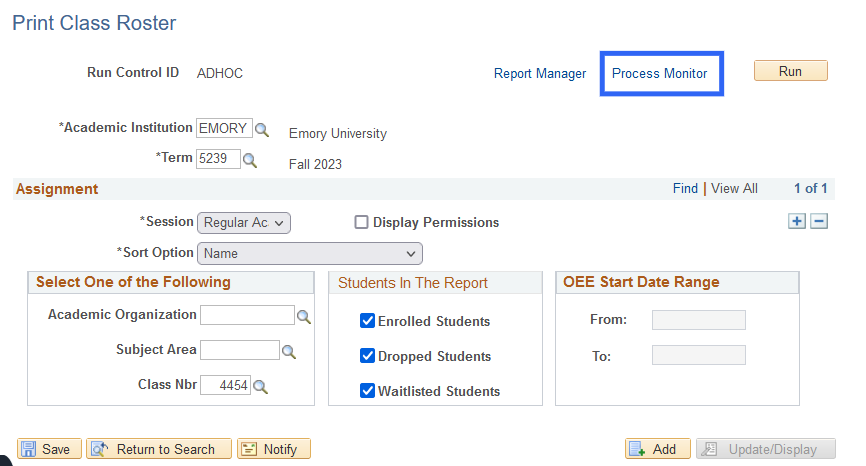
- Academic Institution: Defaults to EMORY.
- Term: Enter or select the term.
Assignment:
- Session: Select the session from the drop-down menu.
Multiple sessions can be added by inserting a row for each session using the plus (+). - Display Permissions: Check the box to see permissions (optional).
- Sort Options: Select Name.
Select One of the Following:
- Academic Organization (department or school): Optional if all rosters are required for a specific school or department – i.e., BUSINESS or ECONOMICS.
- Subject Area: Select a subject.
- Class Nbr: Enter the 4-digit class number.
Using the Advanced Search feature, use the magnifying glass to find the four-digit number.
Students In the Report:
- Determine the student population to print, Enrolled, Dropped, or Waitlisted.
- DO NOT use the OEE Start Date Range.
- Use the plus sign (+) to add a row to print multiple classes.
- Save when the set-up is complete.
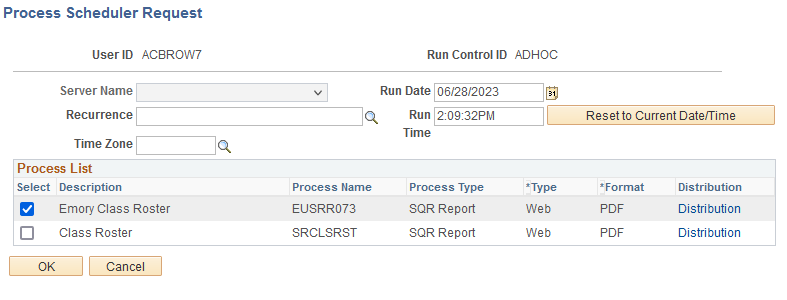
- Click Run.
- Select Emory Class Roster.
- Click OK.
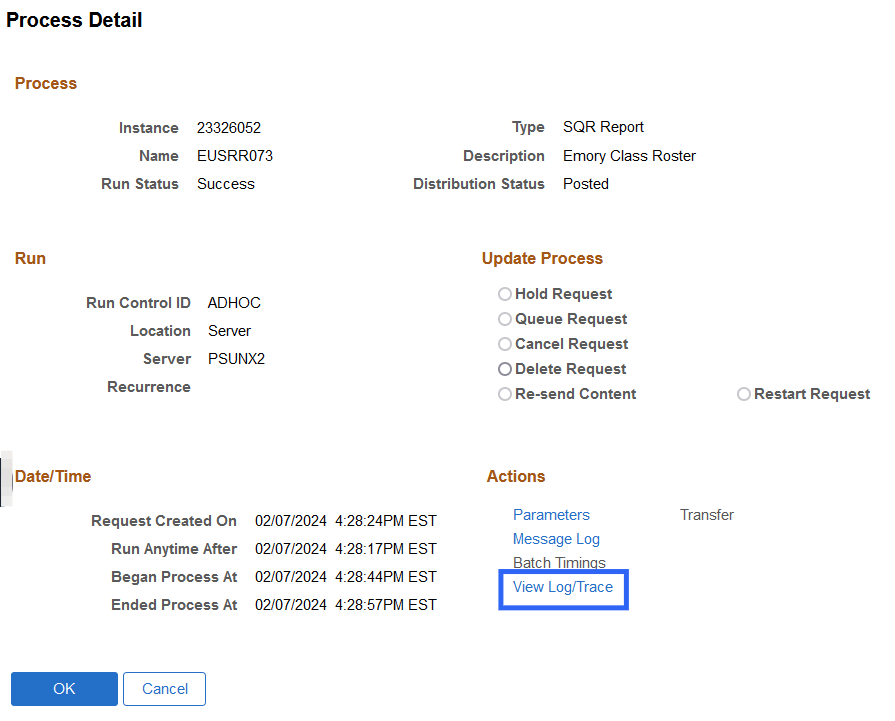
- Click the Process Monitor link.
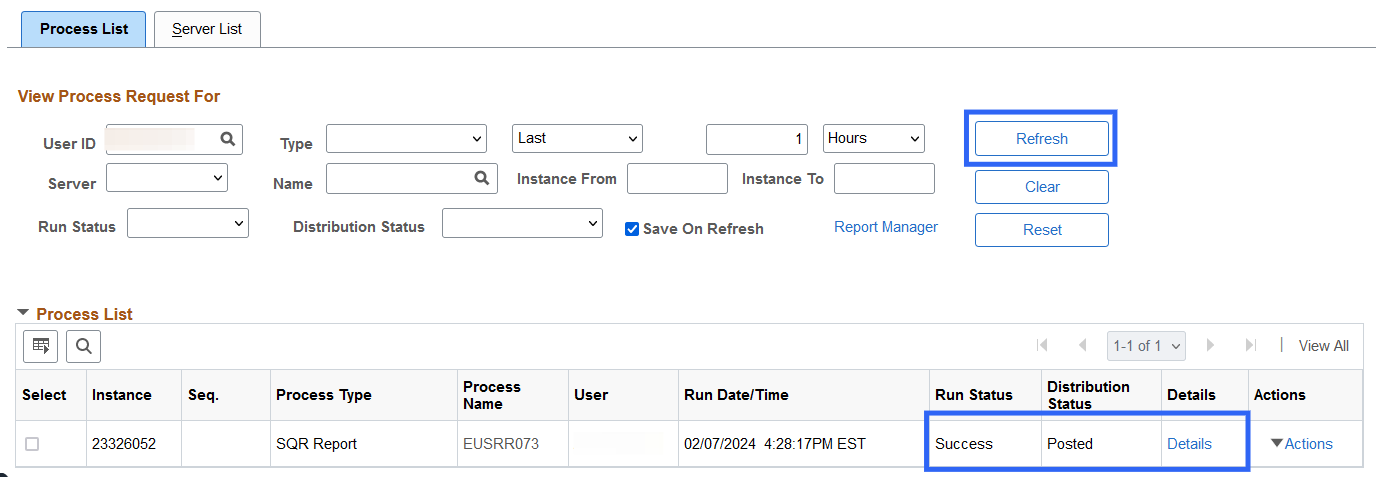
- Click Refresh until the Run Status is Success and Distribution Status is Posted.
- Click the Details link after the status is Success and Posted.
- Click the View Log/Trace link.
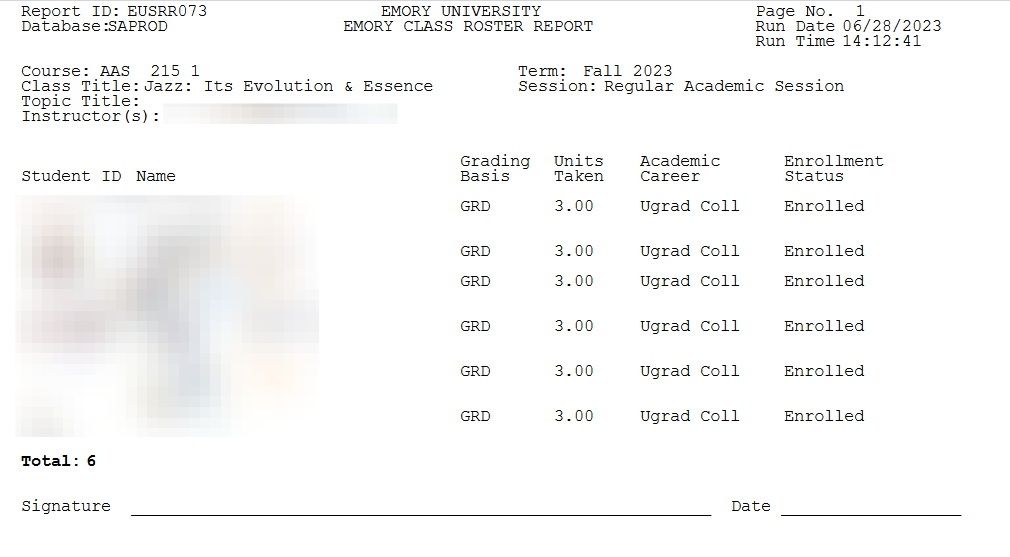
- Click the PDF file.
- A printable version of the class roster will appear in another tab.